Another Year, Another Project
Happy New Year, everyone! I kicked off my new year by completing another quilt top, eating my favorite snacks, watching New Year’s Rocking Eve, and a hot bath. It was a great night.
Last weekend, when I came home, I had wrapped up my HST BOM and I didn’t want to start on my January goal project yet. However, I wanted to sew. So, what could I do with supplies on hand and would be quick.
So, I perused Pinterest and searched based on “Jelly Roll Patterns” - PS, if you do this, the first suggestion may be “Jello Shot Recipes,” so don’t get click happy as you type in the search. I found these two pins that used only the Jelly Roll - which was perfect since I don’t have too much in the way of background/filler material in the house.


So, from the second screen shot, I could tell I needed to sew four strips together, square them (in my case 8 1/2 inches) and then place how I wanted. I basically followed these steps, but with one alteration.
So, first, I got lucky and selected a Jelly Roll with 40 strips - I sorted those in the ten groups of four and sewed them together.

After these were sewn, I measured how long my strip was and it was right around 8 1/2 inches. So, that’s what I cut each strip set down to for squares. Now, the change I made from the screen shot above is that I didn’t cross my strip sets (seams running perpendicular to one another). I flipped the light to the dark (seams nesting and parallel).

To cut into my square into HSTs, I lined up my ruler corner to corner each side to get four HSTs.

Then I squared them up. For this project, I squared to 5 1/2 inches (so a 5 inch finished block). I’m using the Tucker Trimmer here (man, I need to get that HST tool review written!)

So, my four HSTs that came out of my squares looked like this below:
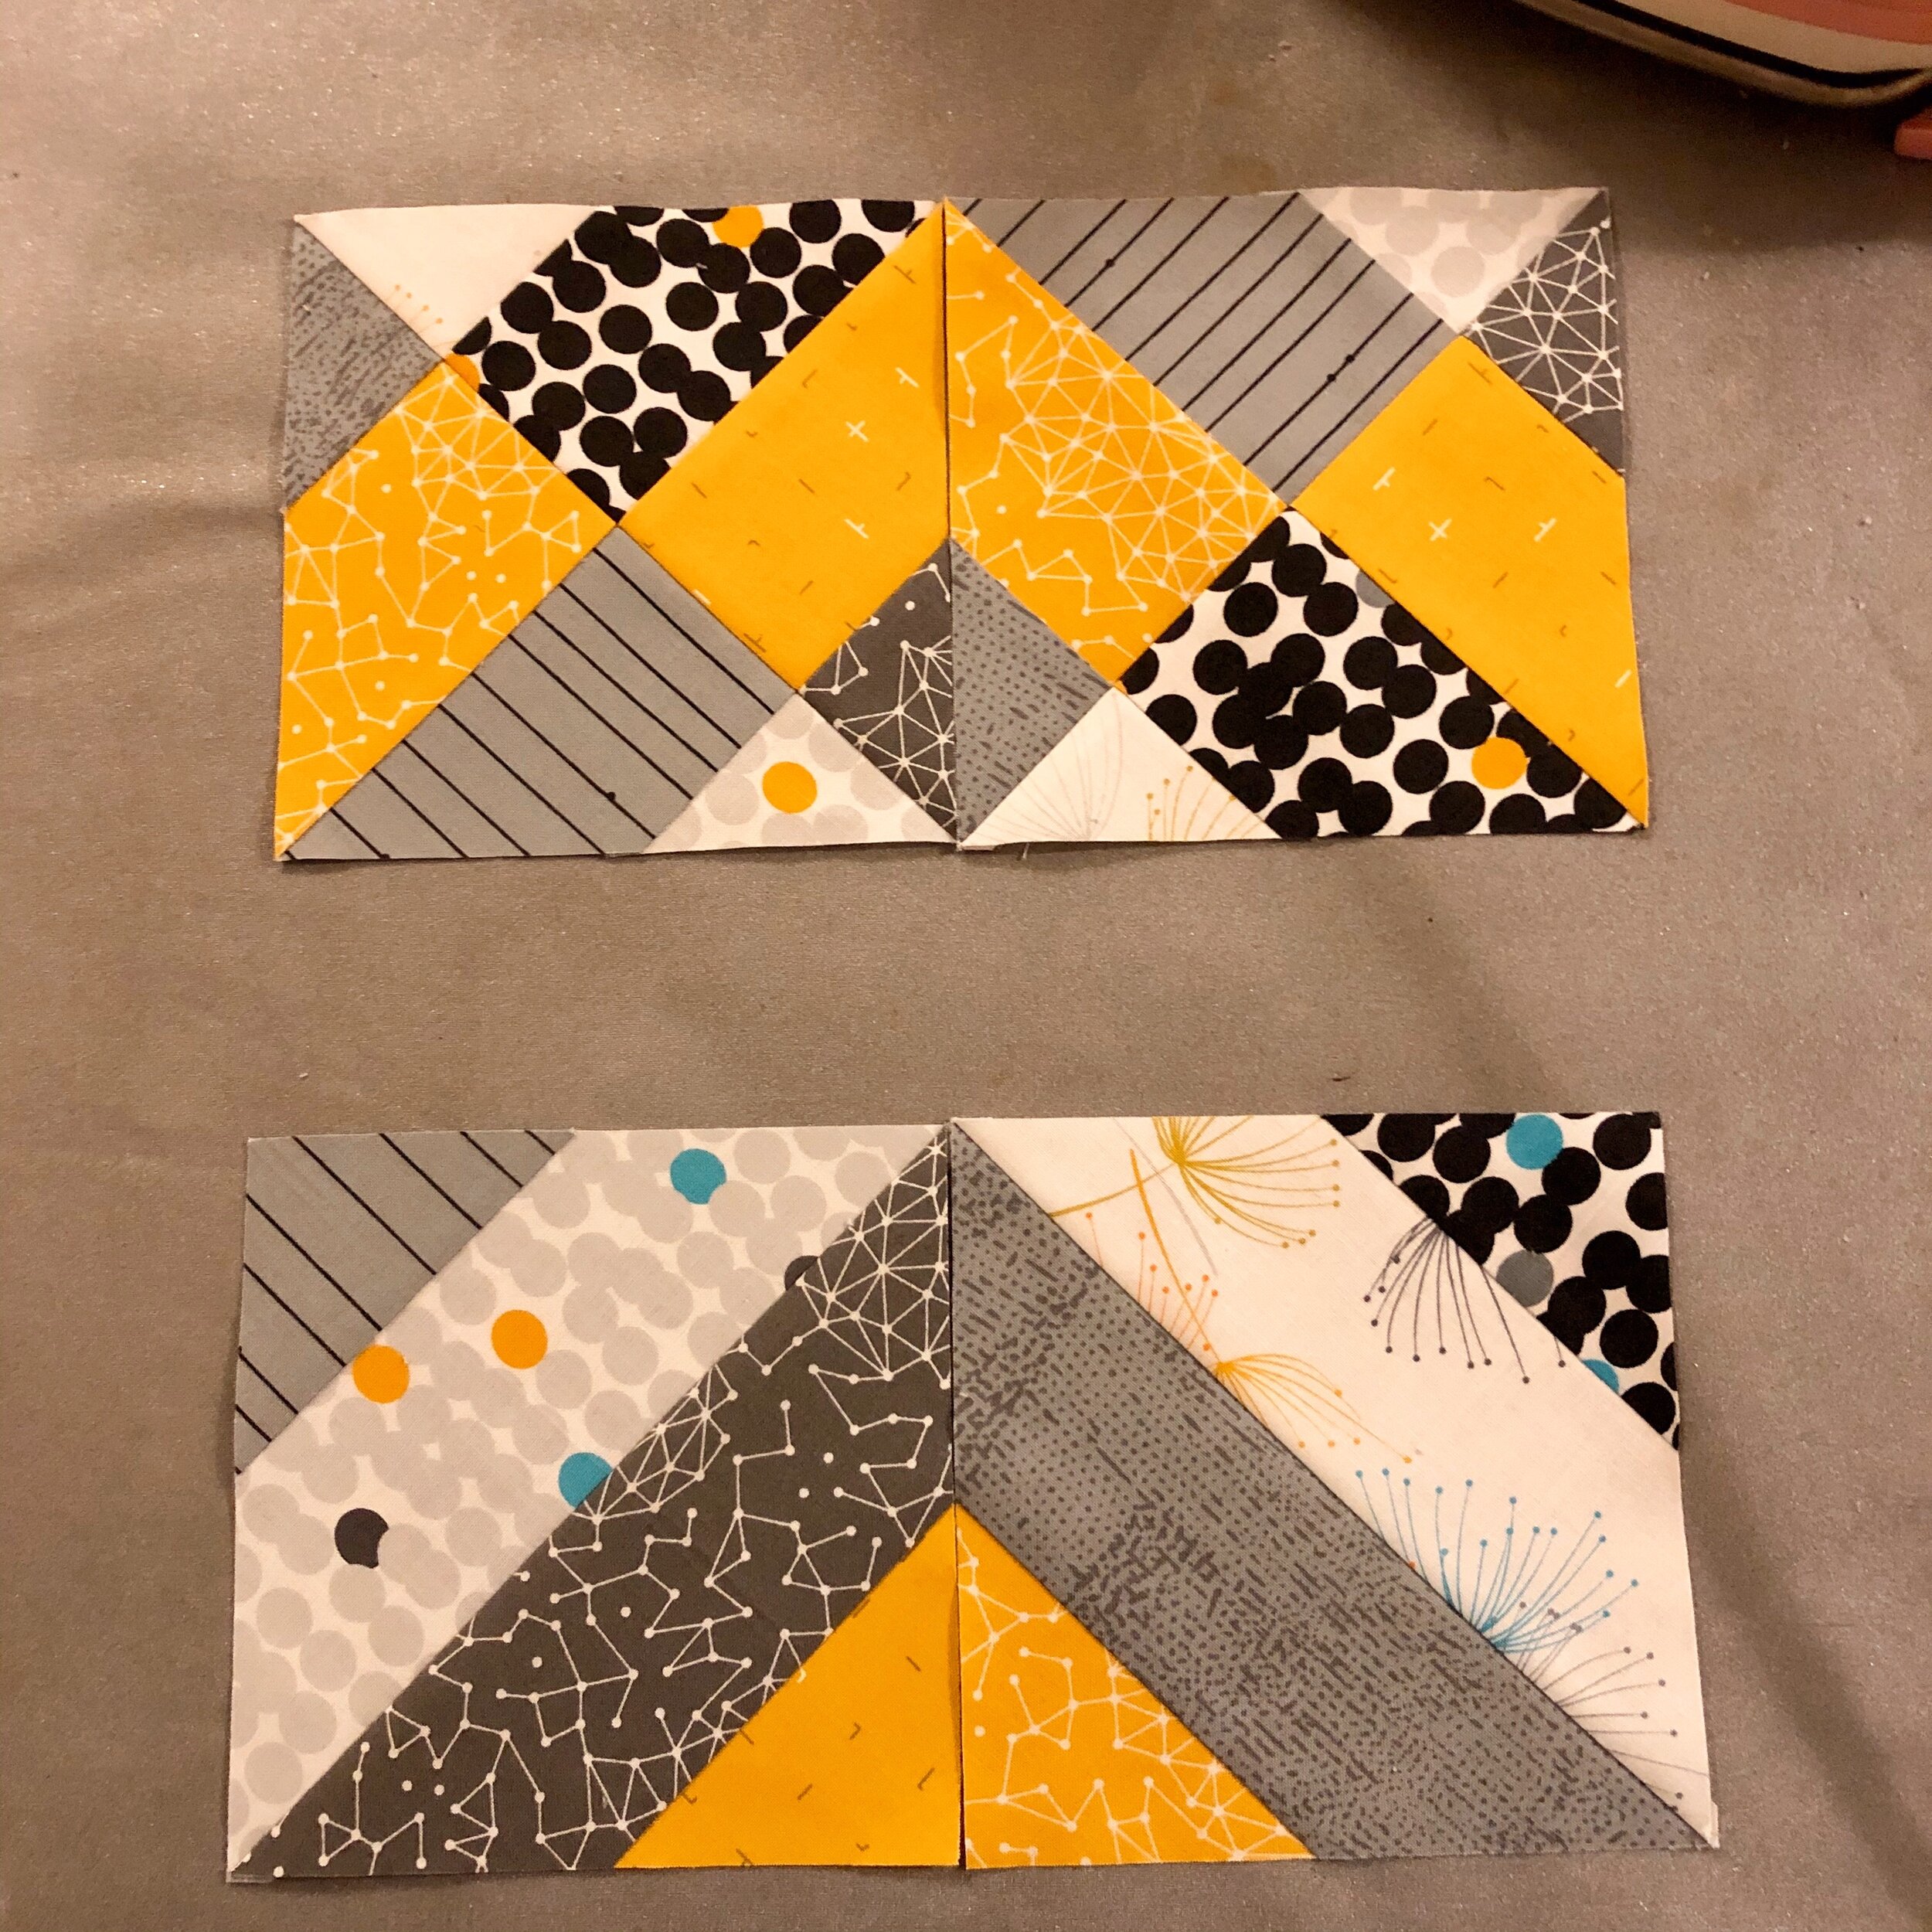
Which I arranged into this as my final block:

By doing my placement this way, when I pieced my top, I got two secondary blocks that appeared - it was pretty cool!
A few things I learned - I did press my seams so they would nest when I was sewing together the first squares. However, when I was putting my blocks together, not all my seams ran opposite for nesting and I also ended up with some bulk. I didn’t feel it was worth it to repress because it caused issued with other blocks I would eventually connect to. So, bottom line was I did my best, but I do have some seams that aren’t perfectly aligned. I think if I do this again, I’ll press the seams open. I’d also like to do this with maybe two solids only - I had a few spots that weren’t perfect opposite colors and I do think working with only two colors would help with placement and figuring out what the pattern truly needs to be.
I am, nonetheless, extremely happy with how it turned out. I also think I may try to quilt this one myself because it does have nice lines to do some straight-line quilting on.
So, here’s the final “mushy” project!

My mom said she saw spools of thread - maybe that’s what we’ll call it - “Hidden Spools".”
I also started on my January Oh Hello Done project. I am going to layout more blocks tonight, but here’s a little sneak peek of the first seams.

I’m really happy with how this is turning out so far! This pattern is really going to let the big patterns in the material shine through.
What do you think? Really not too shabby for no pattern and a Pinterest picture to go off of, was it?
Again, Happy New Year! Talk to you soon.