It's A Sew-A-Long
I’ve had my eye on these blocks for a while…I just had never purchased them. But, when Alison Glass announced a sew-a-long with these little, and I mean LITTLE, cuties, I jumped on board and said now is the time. And, with extra time at home now, adding a sew-a-long is needed to kill some extra time during the week.
This is the Mini Series Sew-A-Long and it is brought to you by Alison Glass and Giucy Giuce - and it is definitely a skill builder. So, yes, I followed my rule of using a sew-a-long to build and improve my skills. It is another foundation paper pieced sew-a-long so maybe I have a theme running for 2020. My fabric pull is below, but you will want low volume prints for sure (or solids) if you purchase these blocks. I decided to go with a white background fabric.

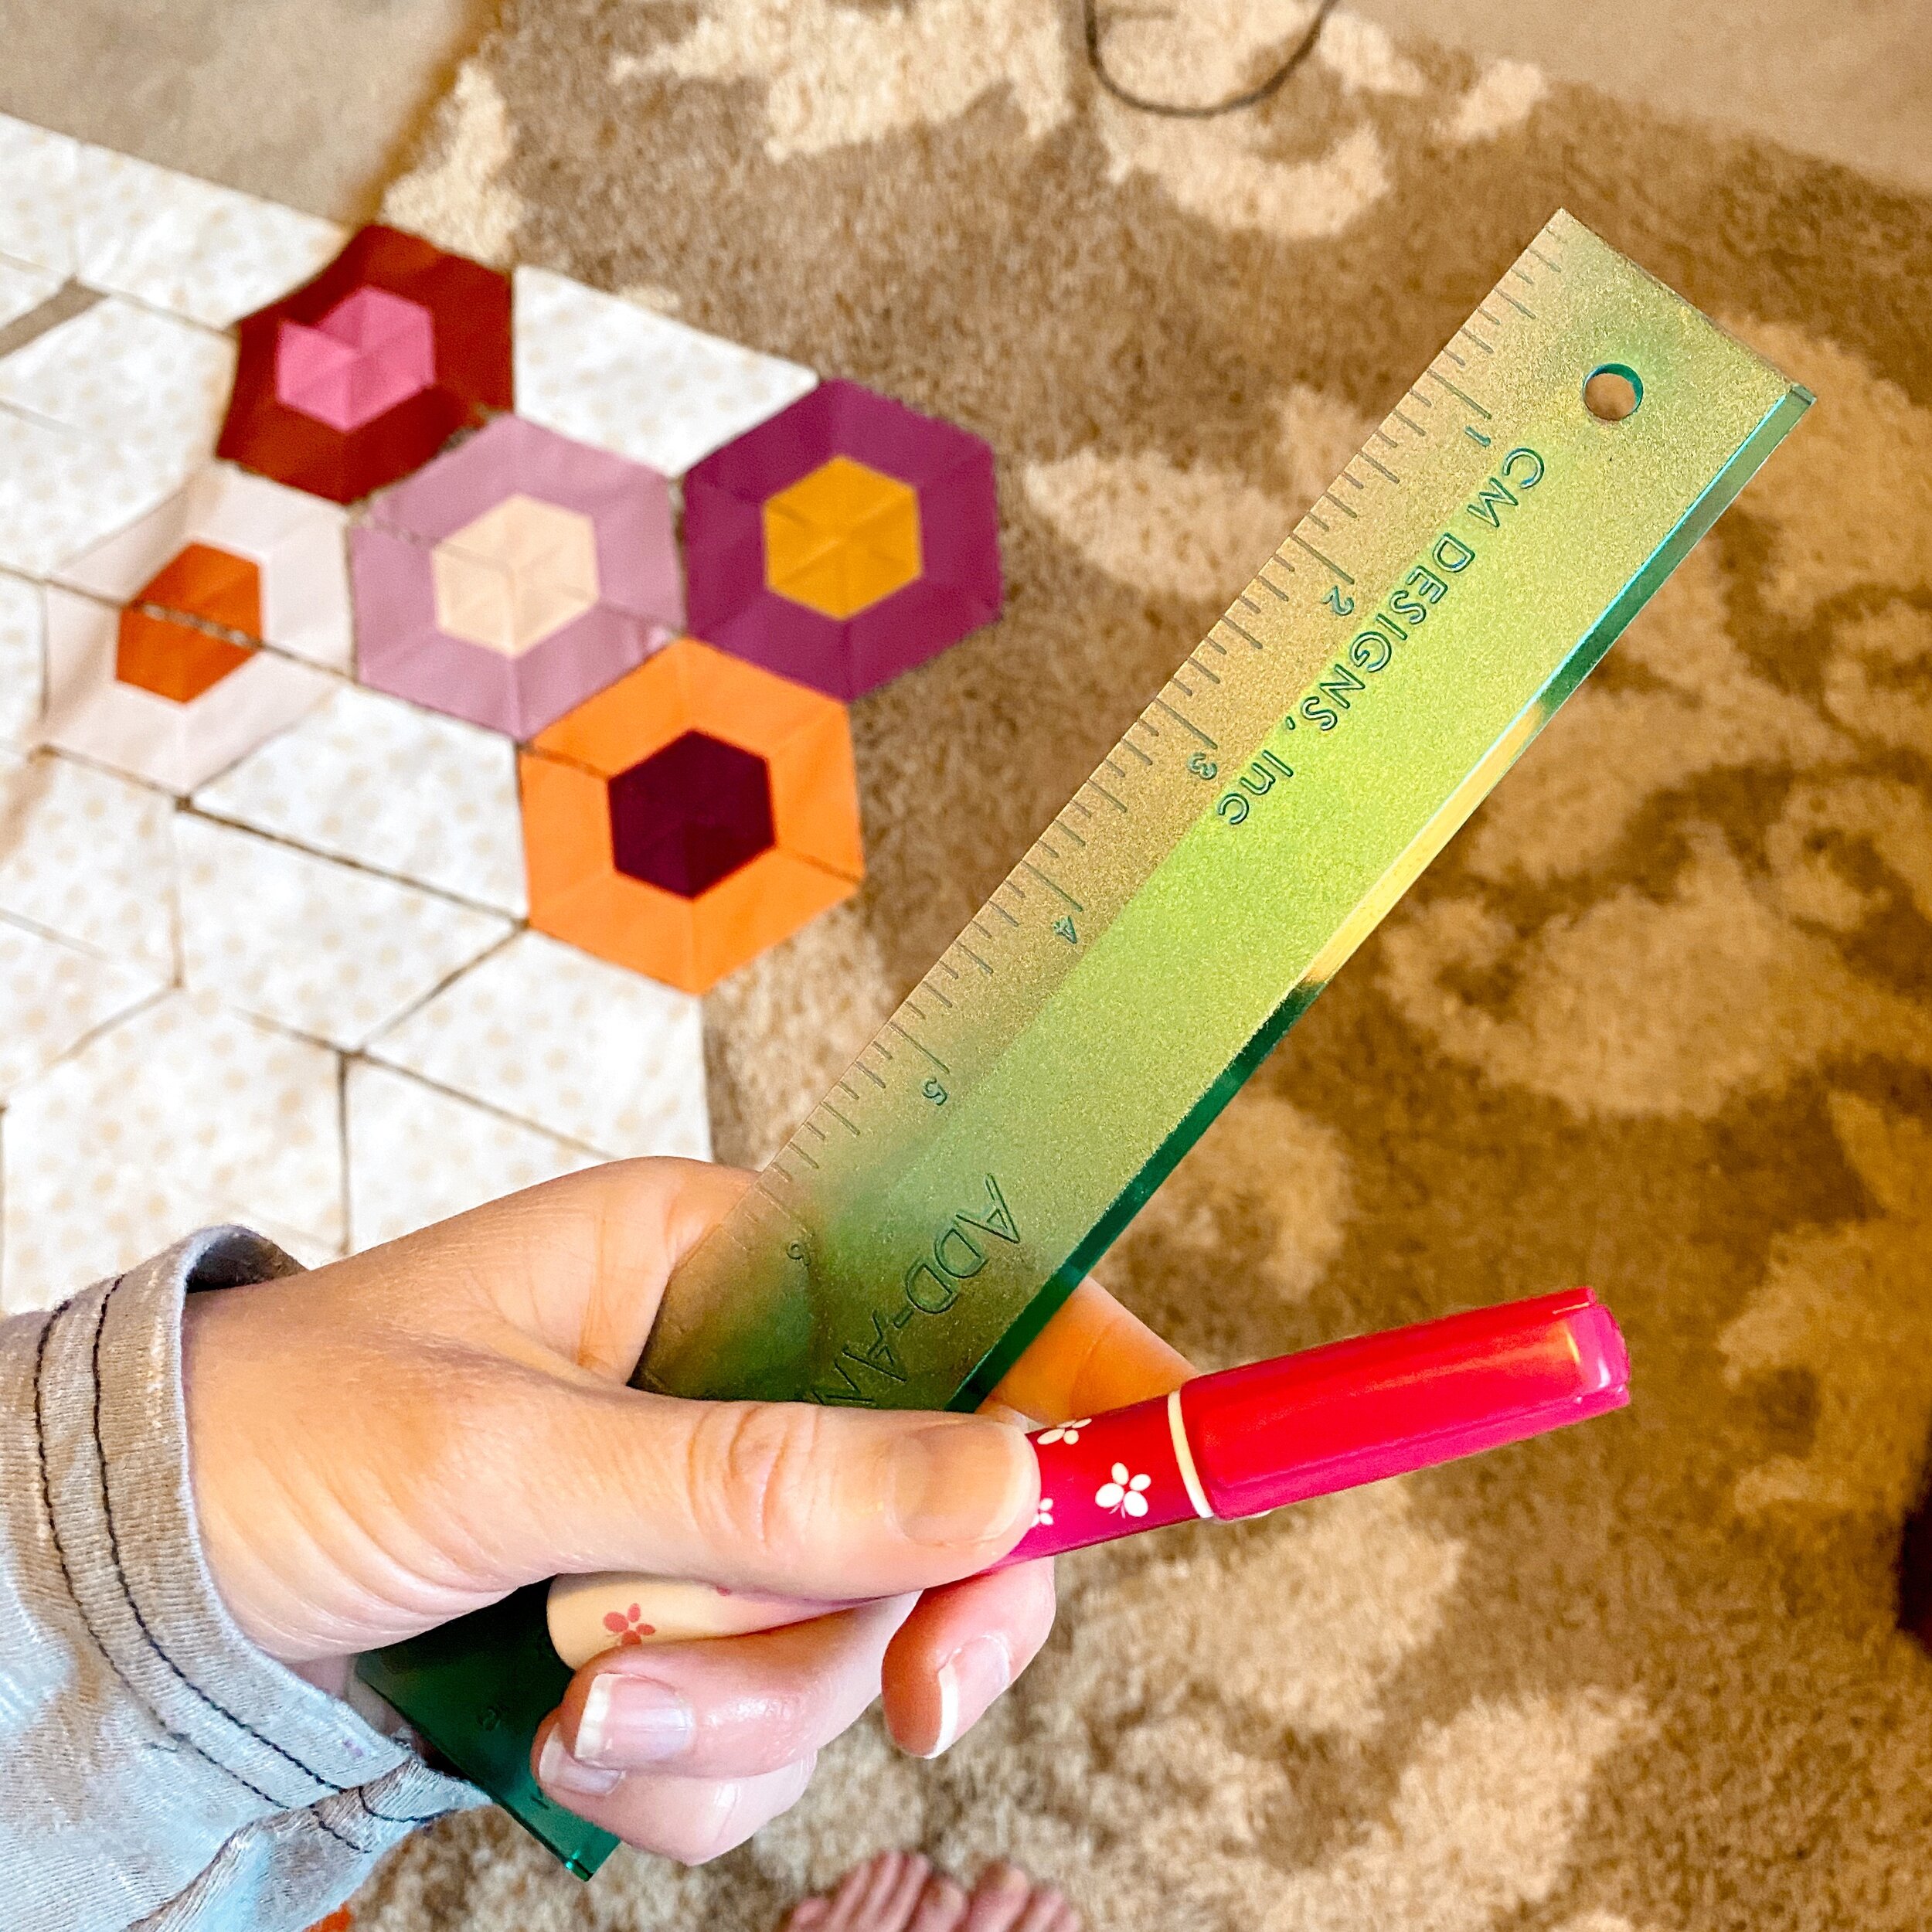
I was very thankful that Giucy Giuce posted some tip videos before - here he mentioned getting an Add-An-Eighth Ruler (I have the quarter inch one) and I was very happy I did after sewing my first block. If I would’ve used my quarter inch, I would’ve been sewing my seam allowance into the next seam. Also, start with a bigger piece of material - I worked with approximately one inch width pieces and I didn’t waste a lot. Another thing I did was glue down my first piece of material.
Also, as I learned from my Paper Pieces BOM, trim your seam first. For example, before you sew Piece 2 to Piece 1, fold back the paper at the sew line between the two, line up your ruler, cut the seam on the Piece 1 material , and then line up Piece 2 to Piece 1 where you just cut for your seam allowance. This prevents you from over/undershooting with your placement and helps you keep your material straight.
So, go to tools are your ruler and glue.
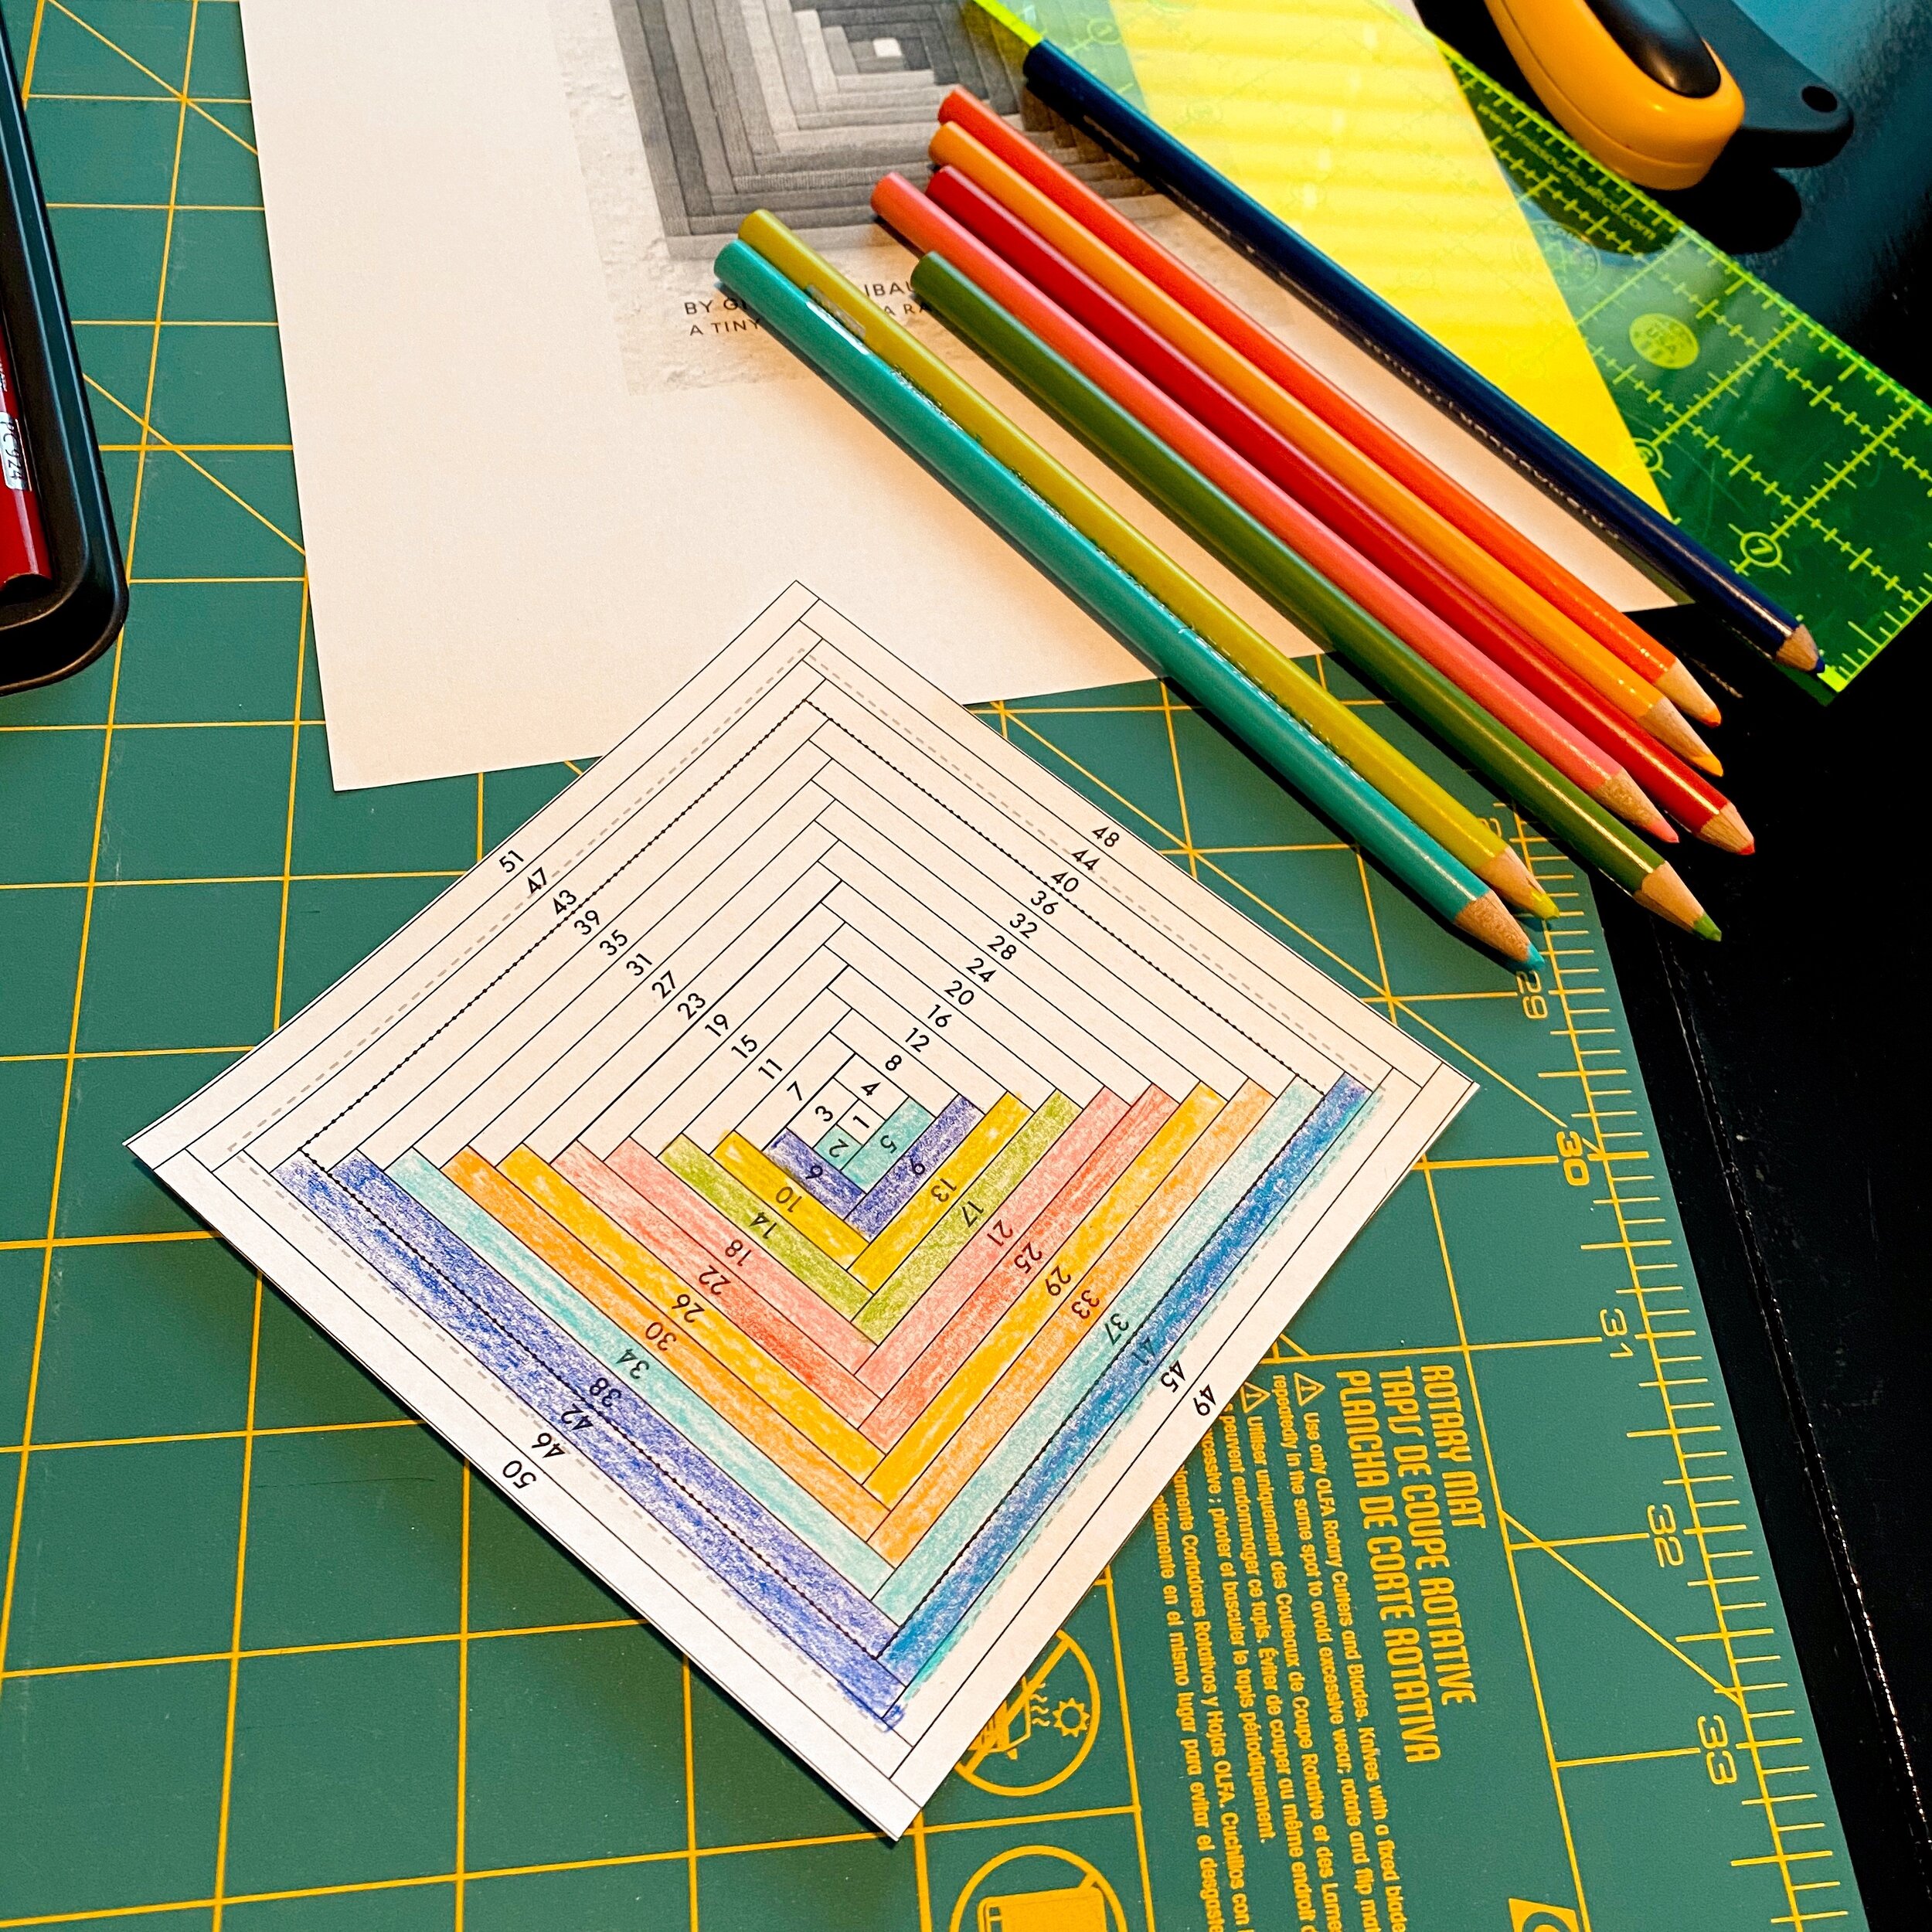
In the special Facebook group for the sew-a-long, I noticed a member had colored her paper piecing sheet. This was a life saver and I know that it saved me so much ripping out as I got turned around as I was making the block. I’m actually thinking about doing this now on my Paper Pieces BOM, even with those being larger.
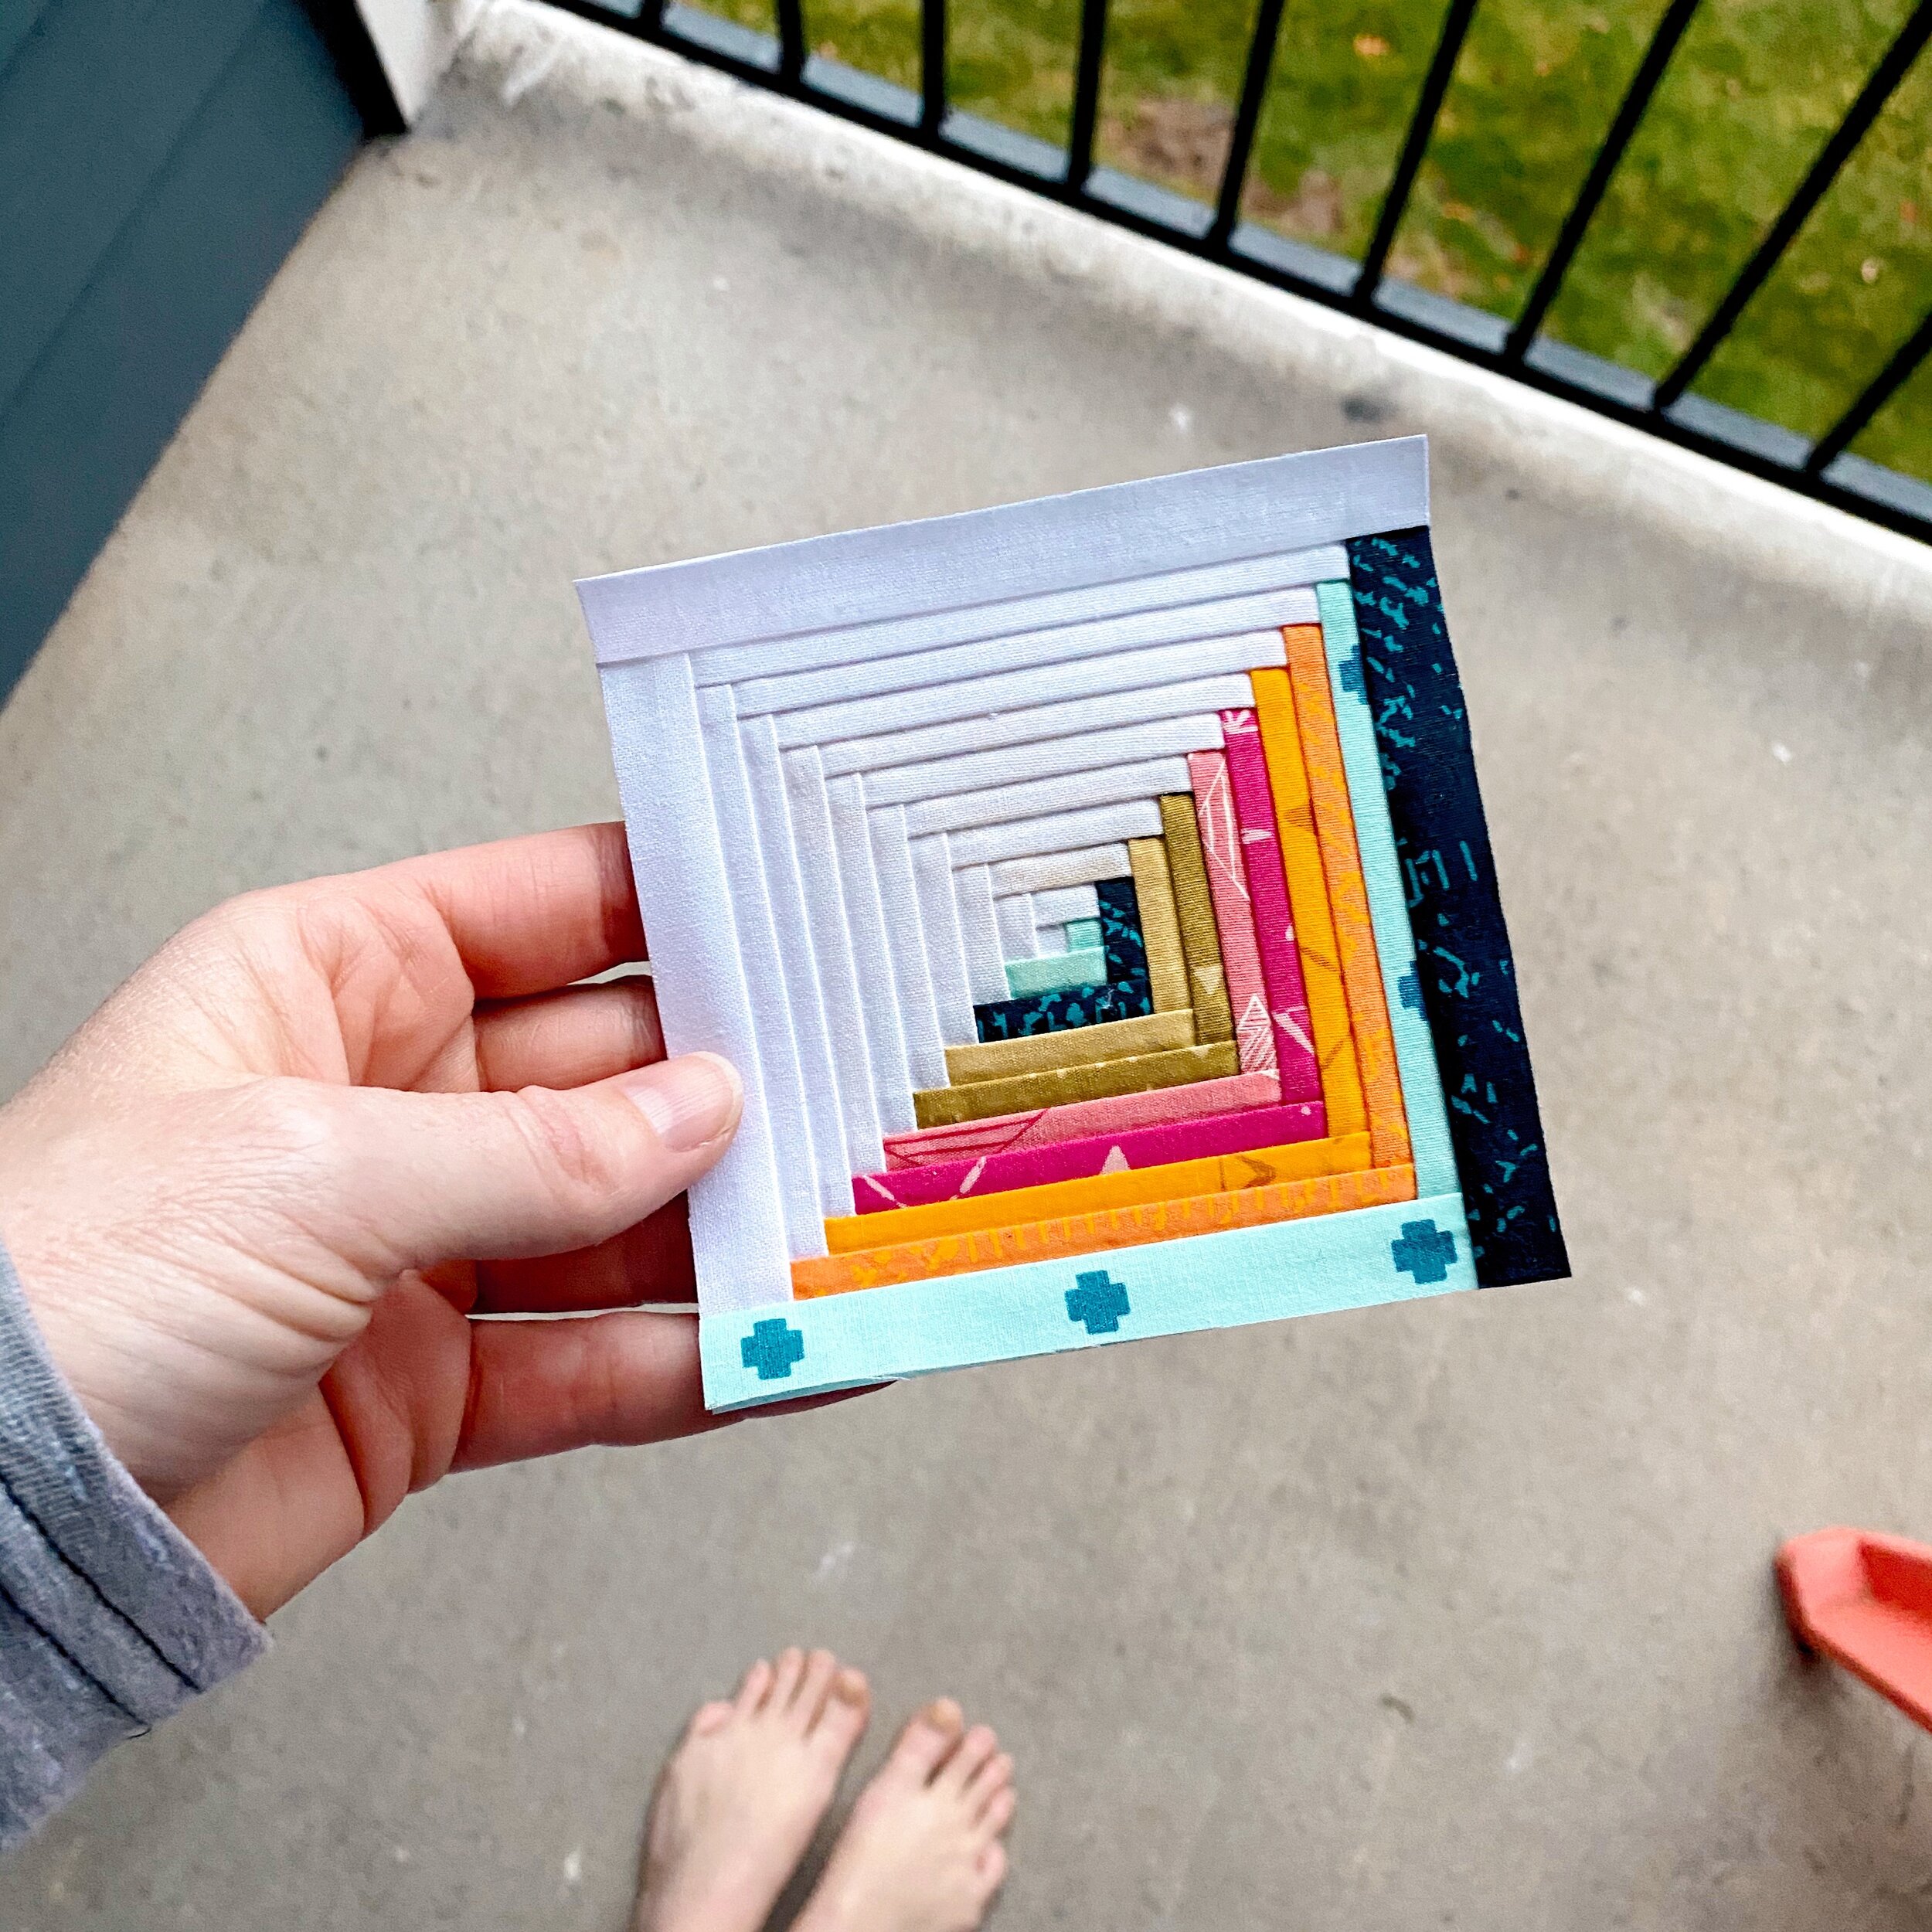
Then, I got to sewing. I did slow my machine speed WAY down. The pieces finished are just over an eighth of an inch and to help me not overshoot and pay attention, I slowed Gloria Clare way down. I also backstitched.

While the block is intricate and requires focus, it was fun to make, I enjoyed the process of seeing what exactly would be shown on the material as I sewed along. For the finished project, I think I’m going to make my blocks into a wall hanging/mini-quilt.
So, my top tips for you in approaching a mini paper pieced block are:
1) Color code your foundation paper piece.
2) Use bigger pieces and trim down.
3) Use the Add-An-Eighth Ruler (I have the Plus version that is tapered to help you in folding back your paper).
4) Trim your seam allowance first.
5) Slow down your sewing machine speed.
6) Backstitch.
7) Be patient!
There’s tons of great advice on paper piecing on the internet and I’ve learned from a lot of great teachers. And the learning is leading to great results!
Have you made any mini-blocks before? Do you want to try? Let me know in the comments below and be ready for another reveal next week!